Intravenous (IV) therapy is one of the most fundamental and critical treatment modalities in modern healthcare. Statistics indicate a vast number of IV infusions are administered annually. Behind this immense medical demand, the IV infusion set serves as the vital link between medication and the patient, underscoring its paramount importance. However, what may seem like a simple procedure involves complex medical principles and stringent operational protocols. Even a minor oversight can lead to infusion reactions, infections, or severe, life-threatening consequences.
This article provides a comprehensive, in-depth analysis of the structure, function, usage, and critical precautions associated with IV infusion sets, drawing from medical expertise and clinical practice. Whether you are a healthcare professional, patient, or family member, you will find practical knowledge and guidance within to help ensure infusion safety.
Part 1:
Part 1:
In-Depth Breakdown of Basic IV Set Structure and Components
1.1 Spike/Inlet Assembly
Spike Structure and Function
The spike is the starting point of the IV infusion set, typically made of stainless steel or high-strength plastic. Its tapered tip is designed to cleanly pierce the rubber stopper of an IV bottle or bag, minimizing the generation of rubber fragments (coring). Standard spikes have a diameter of 2-3 mm and a length of 3-5 cm, sufficient to penetrate standard medical rubber stoppers.
Spike design considers multiple factors. Firstly, sharpness: too blunt causes difficulty piercing and increased coring; too sharp risks accidentally puncturing the protective cap during packaging or transport. Secondly, length: it must fully penetrate the rubber stopper ensuring the tip enters the liquid space, preventing air intake. Modern spikes are often siliconized to reduce piercing resistance, enhancing ease of use.Protective CapThe protective cap maintains the spike’s sterility and sharpness. It is a rigid plastic cover removed with a twisting motion immediately before use.
After removal, the spike should be inserted into the IV container without delay, not left exposed to air for more than 30 seconds to avoid microbial contamination. If insertion is delayed after cap removal, the spike should be covered with sterile gauze, though sequential preparation ensuring continuous operation is best practice.Air Inlet/Vent
Essential for rigid glass bottles, the air inlet system equalizes pressure as fluid drains, preventing a vacuum that would halt flow. It typically consists of a tube with a hydrophobic air filter (usually 0.2 microns) that allows air entry while filtering out bacteria and particles. This system is unnecessary for flexible plastic bags, which collapse as fluid empties.
1.2 Drip Chamber
StructureThe drip chamber, the most recognizable part, is made of highly transparent medical-grade PVC or PP. It is typically 6-8 cm tall with a diameter of 3-4 cm and a capacity of 20-30 ml. Its precise drip orifice controls drop size. Standard sets are calibrated to deliver 15-20 drops per milliliter (macrodrip), while pediatric sets deliver 60 drops per milliliter (microdrip).
Flow Rate Calculation and Significance
Understanding flow rate is crucial for safety. The basic formula is:
Drops per minute = (Total Volume in ml × Drip Factor in drops/ml) ÷ Infusion Time (minutes)
Conversely, infusion time can be calculated as:
Infusion Time (minutes) = (Total Volume in ml × Drip Factor) ÷ Drops per minute
For example, if 1000 ml needs to be infused over 6 hours using a 20 drops/ml set, the required rate is: (1000 × 20) ÷ (6 × 60) ≈ 55.6 drops/minute.
Accurate rate control is critical. Too fast can cause fluid overload, particularly in patients with cardiac or renal insufficiency, potentially triggering heart failure or pulmonary edema. Too slow may lead to underdosing or line occlusion.
Filling Level
The chamber should be filled to one-third to one-half of its capacity. This level optimizes drop visualization, prevents air entrainment from splashing, and avoids submerging the drip orifice (which prevents drop counting).
The correct filling method: Connect the set to the IV container, keep the chamber upright, close the downstream regulator, and gently squeeze the chamber (if soft) or briefly open the regulator to allow fluid in. Stop when the liquid reaches the appropriate level.
1.3 IV Tubing
Material and Properties
Standard IV tubing is 150-200 cm long, made of medical-grade PVC or silicone. Key properties include high clarity (>90% light transmission for observing fluid, bubbles, and debris), flexibility, kink-resistance, chemical stability, and non-toxicity.
Design Details
Tube walls have optimized thickness for strength and flexibility. Inner surfaces may be treated for smooth flow. Volume/interval markers aid tracking. Connection points are reinforced for durability.
Light-Sensitive Tubing
For drugs degraded by light (e.g., Nitroprusside, Amiodarone), amber or opaque tubing is used. While the tubing is opaque, the drip chamber often remains clear but may be covered with a light-blocking sleeve.
1.4 Flow Regulator/Control System
Roller Clamp
The most common type. A roller compresses the tubing; moving it adjusts the lumen size and flow rate. It allows fine, stable adjustments. Avoid leaving it clamped at the same spot for extended periods (>4-6 hours) to prevent permanent tubing deformation.
Slide/Bar Clamp
A simpler clip mechanism. Less precise than roller clamps but reliable for quick on/off control. Often used in conjunction with a roller clamp.
Precision Regulator
Used for critical infusions (e.g., chemotherapy, neonates). Features calibrated dials or screw mechanisms for highly accurate flow control, requiring careful calculation and monitoring.
1.5 Injection Port
StructureThe injection port contains a self-sealing septum (Butyl or Silicone rubber) housed in a plastic port. It allows needle puncture for secondary drug administration and seals after needle withdrawal.Proper Use (Aseptic Technique)
- Verify drug, dose, and compatibility.
- Disinfect the port surface thoroughly with an alcohol swab using a spiral motion from center to periphery for at least 30 seconds. Allow it to dry.
- Hold the port steady, insert a needle (typically 22-25G) perpendicularly into the center of the septum.
- Inject steadily without excessive force. Rapid injection can cause pressure spikes.
- Withdraw the needle straight out. Check for leakage.
Precautions
- Avoid using large-bore needles.
- Rotate puncture sites if multiple injections are needed.
- Be aware of drug-port material compatibility issues.
- Replace the set if the port leaks or the septum is damaged.
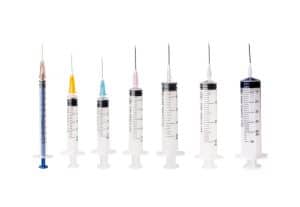
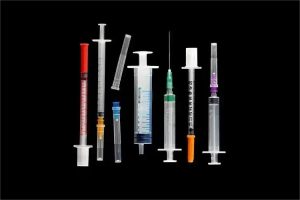
1.6 Needle Adapter/Patient ConnectionLuer ConnectorThe universal standard connection. Includes Luer-Slip (friction fit) and Luer-Lock (threaded for secure connection) types. Luer-Lock is preferred for unstable patients or long infusions.Connection to IV CatheterModern practice uses peripheral IV catheters. After successful insertion and stylet removal, the Luer connector of the primed IV set is aseptically connected to the catheter hub (e.g., a needless connector).Butterfly/Straight NeedleFor single-use infusions via direct venipuncture. Needle gauge (e.g., 20G, 22G) is chosen based on patient and therapy. Needles must be disposed of immediately and directly into a sharps container – never recapped.Part 2: Core Functions of IV Sets
2.1 Medication Delivery: Medical PrinciplesGravity Flow PhysicsFlow relies on hydrostatic pressure from the height difference between the IV container and the patient. The container must be hung 60-100 cm above the IV site to overcome venous pressure (approx. 5-15 cmH₂O).Flow ResistanceGoverned by fluid dynamics principles. Resistance increases with tube length/fluid viscosity and decreases dramatically with wider tube radius. This explains slower flow in pediatric sets (thinner tubes) or with viscous fluids (e.g., blood, lipids).Physiological ImpactIV fluids enter the bloodstream directly, rapidly affecting circulation. Excessive speed/volume can quickly overload the heart, especially in patients with compromised cardiac or renal function.
2.2 Flow Rate Control: Clinical SignificanceRate Requirements by Drug Type
- Crystalloids (e.g., Normal Saline, 5% Dextrose): 40-60 drops/min (adults).
- Nutrition (Amino Acids/Lipids): Slower, 20-40 drops/min.
- Antibiotics: Varies (e.g., Vancomycin requires slow infusion >=1 hour per gram).
- Vasoactive Drugs (e.g., Nitroglycerin): Typically use an infusion pump.
- Potassium: Must be diluted and infused slowly (max 20-30 drops/min, concentration ≤0.3%).
- Chemotherapy: Often slow (30 mins to several hours).
- Blood Products: Start slow (first 15 mins), then adjust. A unit typically takes 2-4 hours.
2.3 Filtration/ProtectionParticulate MatterSources include rubber coring, glass fragments, drug precipitates. Particles can cause microemboli. Long-term therapy increases risk.In-Line Filters
- Drip Chamber Filter: Coarse mesh at the inlet.
- Final/Membrane Filter: Near patient end, with pores (e.g., 5.0µm, 1.2µm, 0.2µm). A 0.2µm filter removes bacteria. Note compatibility with drugs like lipids.
- Air Filter: On air inlet for glass bottles (0.2µm hydrophobic membrane).
Filter ConsiderationsFilters increase resistance. They can clog or be incompatible with certain drugs. Filters themselves require timely change to prevent microbial growth.2.4 Visual MonitoringDrip Chamber Observation
- Flow Rate: Count drops for 15-30 seconds, convert to minutes.
- Solution Clarity: Check for cloudiness, precipitation, discoloration.
- Bubbles: Large bubbles should be removed; tiny ones are usually harmless.
- Fluid Level: Maintain 1/3 – 1/2 full.
Tubing InspectionObserve for continuous flow, absence of air, kinks, collapse, distension, blood backflow, or leaks.
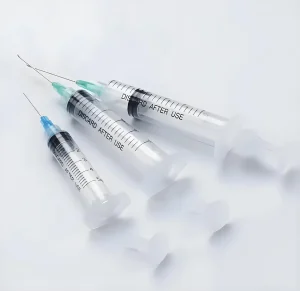
2.5 Safety FeaturesSterility AssuranceManufactured under cleanroom conditions and terminally sterilized (e.g., Ethylene Oxide, Gamma Radiation). Packaging integrity and expiry dates are critical.Single-Use OnlyStrictly single-use to prevent infection transmission and ensure material integrity. Reuse is prohibited.
Anti-Reflux ValvesSome sets include one-way valves to prevent backflow, important with infusion pumps or multiple IV lines.
Part 3: Pre-Use Preparation
3.1 Product Quality CheckPackage Inspection (“Look & Feel”)Check for intact, undamaged, clean packaging. Verify labeling: product name, specifications, manufacturer, expiry date, sterilization method, registration number. Expiry dates must be clear and printed, not stickered.Expiry Date ManagementConfirm product is within expiry. Implement “First-In, First-Out” stock rotation. Quarantine and dispose of expired products properly. Note that improper storage (high temp/humidity, sunlight) can compromise sterility/function even before the expiry date.
3.2 Selecting the Correct SetBy Patient Age
- Neonates (<28 days): Specialized microdrop sets (60+ drops/ml), finer tubing (2-2.5mm ID).
- Infants/Children (28 days – 3 years): Pediatric microdrop sets (60 drops/ml).
- School-age Children (3-12 years): Choice depends on need for precision vs. volume.
- Adults/Teens (12+ years): Standard macrodrip sets (15-20 drops/ml).
- Elderly (65+ years): Standard sets often used but infusion rates typically slower (20-40 drops/min). Consider precision sets for accurate control if needed.
By Drug Properties
- Light-Sensitive Drugs: Use light-protective (amber/opaque) sets.
- Lipophilic Drugs (e.g., Nitroglycerin, Insulin): Use non-PVC (PE, PP) or low-adsorption sets.
- Viscous Fluids (e.g., Blood, Lipids): Use wider-bore tubing or specialized sets.
- Particle-Sensitive Therapy: Use sets with final filters (check compatibility).
- Corrosive Drugs: Use chemically resistant sets as specified.
By Infusion Method
- Gravity Drip: Standard sets.
- Infusion Pump: Use pump-specific compatible sets.
- Syringe Pump: Uses syringe and extension tubing, not standard sets.
- Pressurized Infusion: Use sets with reinforced tubing/connections.
3.3 Gathering SuppliesVenipuncture Tools
- IV Catheter (peripheral): Standard for repeated/long-term access. Sizes: 24G (smallest), 22G, 20G, 18G (largest). Choose based on patient and therapy.
- Butterfly/Straight Needle: For single-use, short-term infusions.
Skin Antiseptics
- 70-75% Isopropyl Alcohol: Fast-acting, but not sporicidal.
- Chlorhexidine-based solutions (e.g., with alcohol): Broad-spectrum, persistent activity. Preferred for higher risk.
- Povidone-Iodine: Alternative, requires drying time.
- Application: Scrubbing motion for 30 seconds, allow to dry.
Securement Materials
- Transparent Semi-permeable Membrane Dressing (TSMD): Allows visualization, secure, comfortable. Standard.
- Medical Tape: Traditional, can obscure site.
- Armboards/Splints: For joint areas or restless patients.
- Protective Sleeves/Covers: For children or confused patients to prevent tampering.
Other EssentialsTourniquet, IV pole/stand, treatment tray/cart, sharps container, sterile gauze, adhesive bandages, IV record sheet.Part 4: Setup & Connection (Aseptic Technique Critical)4.1 Aseptic Technique BasicsHand HygienePerform immediately before handling the set. Use soap/water or alcohol-based rub. Follow proper technique (e.g., WHO’s 5 moments).Maintain SterilityHandle only the outside of packaging and non-critical parts of the set. Do not touch spike, connector interiors, or needle tips.Controlled EnvironmentPrepare on a clean surface. Minimize air currents, talking over the sterile field. Wear appropriate attire.4.2 Connecting to IV ContainerGlass Bottles
- Remove metal cap.
- Disinfect rubber stopper thoroughly.
- Remove spike cap.
- Insert spike firmly into center of stopper.
- Insert air vent needle if present.
Plastic Bags
- Open outer bag.
- Follow manufacturer’s instructions to expose port (tear-off, twist cap).
- Disinfect port.
- Insert spike or connect Luer connector.
Key Point: Perform connection swiftly after removing protective caps.4.3 Priming the Tubing (Removing Air)
- Close flow regulator.
- Fill drip chamber to 1/3 – 1/2 level (squeeze or open regulator briefly).
- Hold set with needle adapter up. Open regulator fully.
- Allow fluid to flow through tubing, expelling all air. Flick tubing to dislodge bubbles.
- Close regulator once fluid (without air bubbles) exits the needle adapter.
- For sets with filters or opaque tubing, priming may take longer. Be patient.
4.4 Connecting to PatientTo an IV Catheter
- Disinfect the catheter hub/needleless connector.
- Connect the primed set’s Luer connector using an aseptic push/twist motion.
- Secure the connection.
Direct Venipuncture (less common)Perform venipuncture with needle attached to primed set. Secure needle upon successful insertion.Part 5: Monitoring & Management During Infusion5.1 Regulating & Monitoring Flow RateCalculating RateUse formula or simplified methods (e.g., for 20 drops/ml set: drops/min ≈ hourly rate in ml / 3).Adjusting RateMake small, gradual adjustments with the roller clamp. Recheck rate after 30-60 seconds.Factors Affecting RateContainer height, tubing kinks/compression, patient position/activity, catheter patency. Recheck frequently.5.2 Routine Monitoring & AssessmentFrequency
- Routine: Every 15-30 minutes.
- Initiation/New Drug: First 15 minutes closely (q5-10min).
- High-risk drugs/patients: More frequent or continuous.
Assess
- IV Site: Signs of infiltration (swelling, coolness, pain), phlebitis (redness, tenderness, cord), infection (redness, warmth, pus).
- Flow Rate: Compare actual vs. prescribed rate.
- Patient Status: Comfort, systemic signs of reaction (rash, fever, chills, dyspnea).
- Solution Volume: Anticipate when nearly empty.
5.3 Troubleshooting Common ProblemsSlowed/Stopped FlowCheck: Closed clamp? Kinked tubing? Low container height? Catheter against vein wall/occluded? Address cause. Do not forcefully flush a peripheral catheter.InfiltrationStop infusion immediately. Remove catheter. Elevate limb. Apply warm/cool compress as indicated. Restart IV in a new site.Infusion Reaction (e.g., Fever, Allergy)Stop infusion. Maintain IV access with saline. Notify clinician immediately. Manage per protocol (antipyretics, antihistamines, etc.). For severe anaphylaxis: Epinephrine, ABCs.PhlebitisRemove catheter. Apply warm compresses.5.4 Discontinuing the Infusion
- Close regulator.
- Loosen/remove securement dressing.
- Place sterile gauze over site. Withdraw catheter/needle smoothly in line with vein.
- Apply firm pressure for 2-3 minutes (longer if coagulopathic).
- Check for bleeding, then apply bandage.
- Dispose of needle directly into sharps container.
- Discard used set as medical waste.
- Document procedure.
Part 6: Special Patient Populations6.1 Pediatric PatientsNeonates/Infants
- Use microdrop sets (60 drops/ml) or infusion pumps for precision.
- Strict volume/rate control based on weight.
- Common sites: Scalp veins (neonates), hand/foot veins.
- Secure meticulously, often using armboards.
- Warm fluids if necessary.
- Parental support and distraction techniques are important.
Children
- Psychological preparation is key.
- Use appropriate language, distraction, rewards.
- Secure site well against movement.
- Monitor closely as they may not verbalize discomfort well.
6.2 Geriatric Patients
- Often have fragile veins. Use smaller gauge catheters (e.g., 22G-24G).
- Cardiac/renal reserve may be reduced. Slower infusion rates (20-40 drops/min), strict volume control.
- Skin may be fragile; use gentle securement and careful removal.
- Cognitive/sensory impairments may affect cooperation/reporting. Involve family, monitor closely.
6.3 Patients with Specific ConditionsCardiac/Renal Impairment
- Strict fluid volume and rate control, often using pumps.
- Monitor for signs of overload (increased respirations, crackles, edema).
- Accurate intake/output recording vital.
Diabetes
- Monitor blood glucose during dextrose-containing infusions.
- Assess site carefully due to potential impaired healing/infection risk.
Immunocompromised/Infection Risk
- Meticulous aseptic technique.
- Closer monitoring for signs of infection.
Part 7: Storage & Disposal7.1 Storage
- Store in cool, dry place per manufacturer (typically 10-30°C).
- Protect from extreme temperatures, moisture, direct sunlight.
- Use FIFO system.
- Maintain clean, organized storage area.
7.2 Disposal
- Single-Use Only. Never reuse.
- Dispose of as medical waste:
- Tubing/Bag/etc.: Biohazard waste bag/container.
- Needles/Catheters (Sharps): Puncture-resistant sharps container immediately after use. Never recap needles.
- Follow local regulations for medical waste disposal.
Part 8: Safety Protocols & Quality Control8.1 The “Rights” of Medication AdministrationRight Patient, Drug, Dose, Route, Time, Documentation. Verify meticulously against IV solution and additives.8.2 Aseptic TechniqueNon-negotiable for preventing infections.8.3 LabelingLabel tubing with date/time of initiation, especially for continuous infusions. Change tubing per facility policy (e.g., every 96 hours).8.4 Patient EducationEducate patients/families to report discomfort, pain, swelling, or any unusual feelings. Instruct them not to adjust flow rate.ConclusionThe IV infusion set is a critical component of safe and effective IV therapy. Its proper use demands knowledge, skill, and vigilance. From understanding its structure and function to meticulous preparation, aseptic technique, and vigilant monitoring, each step is crucial. Adherence to protocols, continuous learning, and a patient-centered approach are fundamental for healthcare professionals. Patients and families play a vital role through cooperation and reporting concerns. By working together and prioritizing safety at every stage, we can ensure that IV therapy remains a beneficial and low-risk treatment modality, upholding the highest standards of patient care.